Let’s cut to the chase: “shin splints” is the everyday nickname for medial tibial stress syndrome (MTSS), a common issue for runners, and weekend warriors who push their limits a bit too hard.
Top Risk Factors for Developing Shin Splints
This chart highlights the most common risk factors contributing to shin splints. The leading cause is a sudden increase in training intensity, followed by biomechanical and environmental issues such as overpronation, inadequate shoes, and hard training surfaces.
Health Support: This Vitamin K2 + D3 Complex is essential for bone density, cardiovascular health, and immune function. It’s a highly-rated formula for those looking to maintain optimal nutrient levels. You can find it on Amazon.
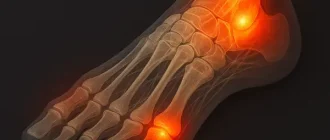
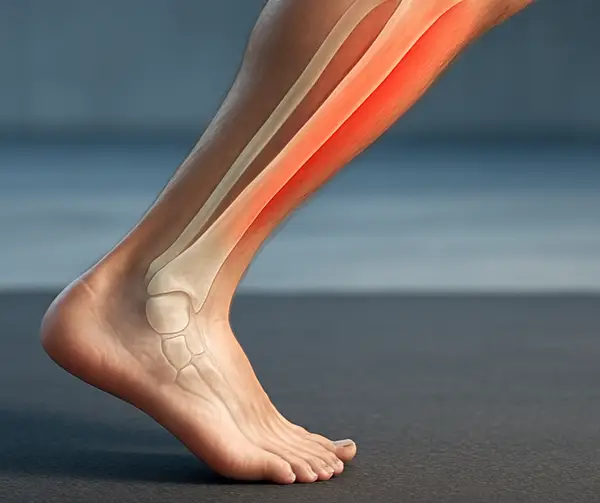
It refers to pain along the inner edge of your shinbone (tibia), where muscles and bone tissue become inflamed (source).
Shin splints usually develop after sudden changes in physical activity. Think: increasing running distance, switching from treadmill to asphalt, or getting back into sports after a Netflix-heavy winter.
The Tell-Tale Signs: Do You Really Have Shin Splints?
Here’s how to spot them like a pro — and understand what each symptom might really mean:
- Aching pain along the inside of the shin (typically the lower two-thirds) — This is the hallmark symptom. It usually starts as a dull ache and gets sharper with continued activity. If the pain runs vertically along the tibia rather than in a pinpoint area, it’s more likely shin splints than a stress fracture.
- Tenderness or soreness when you touch the shin area — Press along the inner shin. If it feels tender along a wide zone (2–5 inches or 5–13 cm), that’s a strong indicator of shin splints. If pain is localized to one small spot, suspect a stress fracture instead.
- Mild swelling in the lower leg — This may be hard to see, especially in the early stages. Look for puffiness or tightness around your lower shin that’s more noticeable after a run or long walk. It’s usually subtle but consistent.
- Pain during or after exercise, especially with high-impact activities like running or jumping — Shin splint pain often shows up after the first mile or after your workout, and worsens the more you push. It’s different from muscle soreness because it doesn’t go away with warm-ups.
- Discomfort that lessens with rest but returns once you hit the track again — This “boomerang pain” is very typical of shin splints. If the pain always comes back after a couple of runs and eases up after a day off, that cycle is a red flag.
Extra Clues to Watch For:
- If the pain eases as you warm up and then worsens later, it’s more likely shin splints than compartment syndrome.
- If you feel pain even at night or while resting, consider a more serious issue like a bone stress injury.
- If numbness or tingling joins the pain — especially with tight, shiny skin — see a doctor ASAP; it may be compartment syndrome.
Notable Stat:
According to the American Academy of Orthopaedic Surgeons, shin splints account for 13% to 17% of all running-related injuries (source).
Health Support: This high-absorption Magnesium Glycinate (200 mg) is gentle on the stomach and supports muscle relaxation, better sleep, and metabolic health. You can find this trusted formula on Amazon.
Common Causes You Might Be Ignoring
Several factors can make you more vulnerable:
- Flat feet or abnormally rigid arches
- Worn-out footwear or lack of proper support
- Running on hard or uneven surfaces
- Weak hip or core muscles
- Poor training techniques or inadequate warm-ups
Don’t ignore these triggers. They can turn a nagging pain into a full-blown stress fracture (and no one has time for crutches).
Diagnosis: How Doctors Confirm It’s Shin Splints
Diagnosing shin splints isn’t rocket science, but it requires ruling out other conditions like stress fractures or compartment syndrome (source).
Diagnostic Tools Used for Shin Splints (% Usage by Physicians)
This chart displays the frequency of diagnostic tools used by physicians to assess shin splints. Physical examinations and patient history are the most commonly used, while advanced imaging is employed in more specific or severe cases.
Here’s the standard breakdown:
| Diagnostic Tool | What It Does | Accuracy (1-10) | Average Cost (USD) |
|---|---|---|---|
| Physical exam | Doctor checks tenderness, swelling, and pain points | 8 | $100-200 |
| X-ray | Helps rule out stress fractures | 6 | $75-150 |
| MRI | Identifies soft tissue inflammation or hidden fractures | 9 | $500-1500 |
| Bone scan | Detects micro-damage in bones | 8 | $300-600 |
Real case: A 26-year-old male in San Diego who ran his first half-marathon developed persistent shin pain. MRI confirmed inflammation of the periosteum — a textbook shin splint.
Treatment: Let Technology and Time Do Their Thing
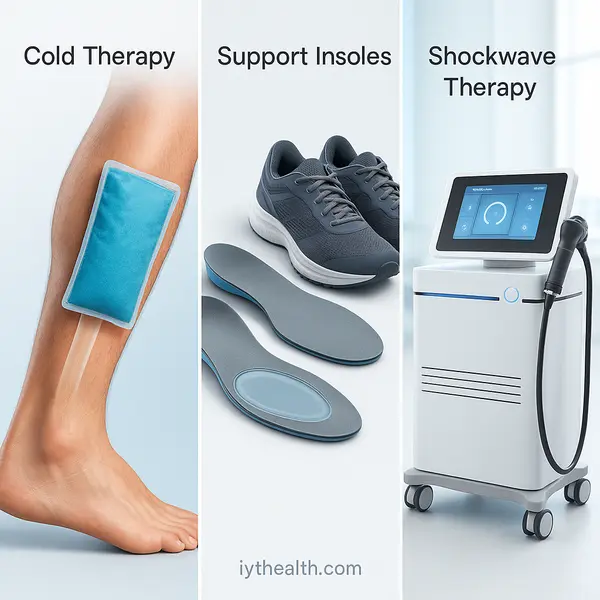
R.I.C.E. Protocol
The classic first line of defense: Rest, Ice, Compression, Elevation. It’s like putting your shin on airplane mode.
- How it works: Ice reduces inflammation, rest prevents further damage, compression controls swelling, and elevation drains fluid buildup.
- Duration: Apply ice for 15–20 minutes, 3 times daily for 5–7 days. Total recovery time: 1–3 weeks if caught early.
- Cost: Under $50 total (ice packs, compression sleeves).
- Effectiveness: 7.5/10 — best used in the acute stage, within the first week of symptom onset.
Shock-Absorbing Insoles
A quiet game-changer for your shoes.
- How it works: Insoles reduce repetitive stress by improving weight distribution and softening ground impact.
- Brands: Superfeet®, Dr. Scholl’s®, Powerstep®.
- Duration: Wear consistently for several months during and after recovery.
- Cost: $30–$80 per pair.
- Effectiveness: 7/10 — supportive for both prevention and early treatment.
Anti-Inflammatory Medications
Short-term relief, long-term caution.
- How it works: NSAIDs (like ibuprofen or naproxen) lower inflammation and reduce pain.
- Usage: Only during acute flare-ups, ideally after meals to avoid stomach upset.
- Duration: 5–10 days.
- Cost: $10–$25 OTC.
- Effectiveness: 6.5/10 — effective in combination with rest, not as a standalone fix.
Physical Therapy
The real MVP of shin splint recovery.
- How it works: A physical therapist designs a personalized plan focusing on stretching, strengthening (especially the tibialis posterior and soleus), gait correction, and mobility.
- Duration: 2–3 sessions per week for 4–6 weeks.
- Cost: $75–$150 per session; some packages reduce cost.
- Effectiveness: 9/10 — especially valuable in moderate to chronic cases or post-injury.
Extracorporeal Shockwave Therapy (ESWT)
Tech meets tissue repair.
- How it works: Delivers high-energy acoustic waves to the painful area, stimulating healing and increasing blood flow.
- Procedure: Non-invasive, no anesthesia. Feels like snapping rubber bands against your skin (yep, it’s odd).
- Duration: Typically 3–5 sessions, once per week.
- Cost: $300–$500 per session.
- Effectiveness: 8/10 — best for chronic or recurring shin splints when conservative therapy stalls and symptoms persist beyond 6–8 weeks. Especially useful for athletes aiming to avoid surgery and accelerate soft tissue recovery.
Most Effective Shin Splint Treatment Methods (Patient-Reported Outcomes)
This chart shows the most effective treatment options for shin splints, based on patient-reported outcomes. The RICE method tops the list, followed by exercises, footwear adjustments, and supportive therapies such as massage and anti-inflammatory medication.
Prevention: Stop Shin Splints Before They Start
- Gradually increase workout intensity (no more than 10% per week) – This is your “slow and steady wins the race” method. Ideal for beginners or returning athletes. Jumping from couch to 5K in a week? That’s how injuries happen. Efficacy: 9/10 in preventing overload-based MTSS.
- Replace running shoes every 300–500 miles (approx. 480–800 km) – Think of shoes like tires. If they’re worn out, they won’t absorb impact well. Good cushioning matters more than fancy branding. Great for regular runners and gym-goers. Efficacy: 8/10.
- Cross-train with low-impact sports (think cycling or swimming) – If you’re nursing early shin discomfort, give your legs a break without becoming a couch potato. Cross-training boosts endurance without repetitive strain. Best for recovery stages or as a preventative routine. Efficacy: 7.5/10.
- Use foam rollers to release tight fascia – Picture your muscles like spaghetti stuck together. Foam rolling separates and relaxes them. Especially useful after long walks, runs, or if you sit for hours. Effective for both prevention and early symptoms. Efficacy: 7/10.
- Don’t skip dynamic warm-ups and cooldowns – Warming up gets your muscles “online” before they’re thrown into action. Think leg swings, hip circles, or light jogs. Cooling down reduces tightness. Perfect for every stage — pre, post, and even on off-days. Efficacy: 8.5/10.
Applying these methods consistently is like building a fortress around your tibia — one smart habit at a time (source).
When to See a Specialist
If the pain is sharp, doesn’t improve with rest, or persists longer than 2–3 weeks, it’s time to consult a sports medicine specialist or orthopedic doctor. Ignoring it could mean risking a stress fracture.
But let’s get real: the signs aren’t always crystal clear.
Here’s what to look out for by scenario:
- Teenage athletes (especially female) might experience shin pain that worsens during track or basketball practice, often paired with fatigue or irregular periods — a red flag for energy imbalance and higher fracture risk.
- Active adults (30s–50s) might notice a dull ache in both legs after walking the dog or doing yard work, even without sports. If it lingers overnight, that’s your cue.
- Office workers or drivers can develop shin discomfort from tight calves due to long hours sitting — they may feel tightness when walking downstairs or early in the morning.
- Seniors or less active individuals may experience bruising, tingling, or numbness in the shins after a minor trip or fall — this could suggest nerve involvement or micro-tears that mimic shin splints.
- If you’re feeling burning pain that radiates to the foot, that’s not a shin splint — it’s likely nerve-related, and time to call the pros.
True story:
A 45-year-old woman in Atlanta began experiencing lower leg tightness and pain after switching to a standing desk. Initially brushing it off as “just age,” she later discovered a posterior tibial tendon issue — not shin splints — requiring physical therapy.
Editorial Advice
Reyus Mammadli, medical consultant, emphasizes: “Many patients brush off shin pain as just part of the game. But persistent discomfort deserves real attention. Investing in proper footwear and training modifications can prevent a lot of unnecessary setbacks.”
Our tip? Don’t play the pain guessing game. A quick consultation can save you months of discomfort (and missed workouts).
Remember: your shins aren’t supposed to scream every time you jog to the fridge.